Hello, dessert enthusiasts! Chef Bin Jaoe here, and today we’re talking about one of my all-time favorite go-to treats—no-bake cheesecake jars. These little wonders are the epitome of easy, delicious desserts that make you look like a pro without breaking a sweat. No oven required, just a few simple ingredients, and you’re good to go. Whether you’re hosting a dinner, throwing a party, or just treating yourself to something sweet, no-bake cheesecake jars are the perfect solution. Let’s dive in!
Looking for more quick and delicious treats? Check out our easy dessert recipes for inspiration that’s perfect for any sweet craving.
Table of Contents
What Are No-Bake Cheesecake Jars?
The Perfect No-Stress Dessert
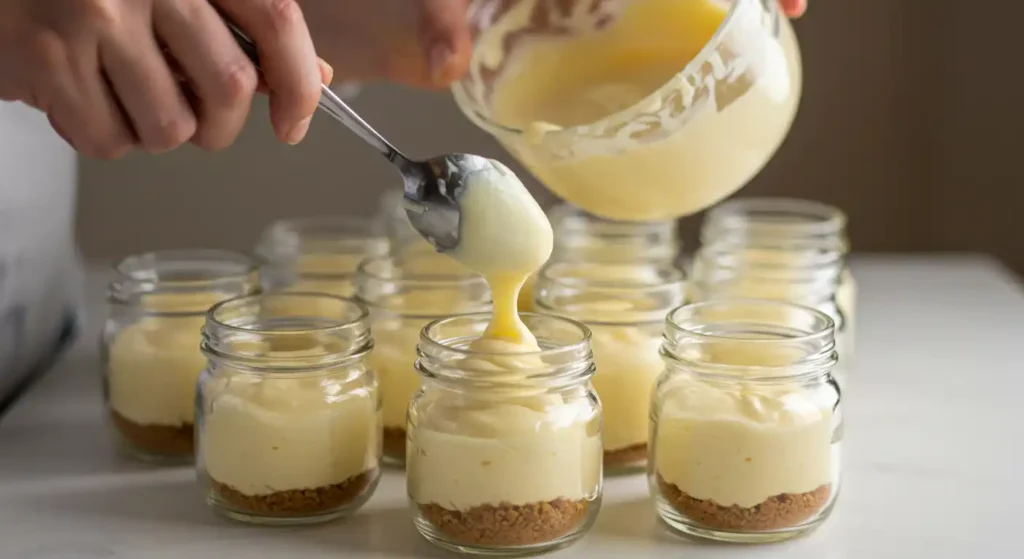
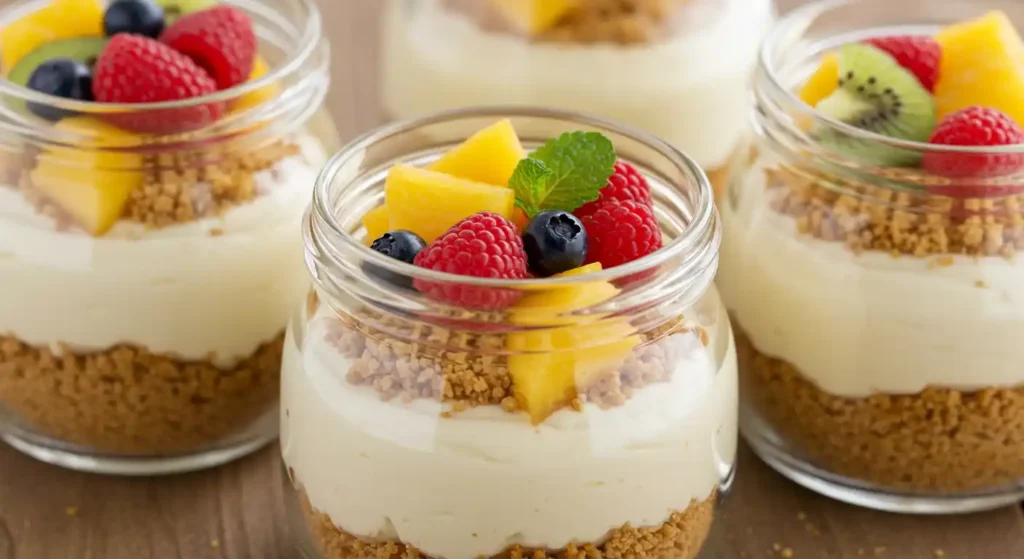
No-bake cheesecake jars are a game-changer in the dessert world. Imagine a creamy, dreamy cheesecake filling layered over a buttery biscuit base—all packed in a jar for easy, individual servings. The best part? You don’t need an oven, and you don’t need to worry about it collapsing like traditional cheesecakes. You just layer it up, chill it, and voilà! You’ve got yourself a fancy dessert that’s as simple as it is tasty.
The Recipe – No-Bake Cheesecake Jars
Easy, Creamy, and Absolutely Delicious
Alright, time to get your hands dirty (in the best way possible) with this no-bake cheesecake jars recipe. Grab a few ingredients, and let’s get started:
Ingredients:
- 1 cup crushed graham crackers or digestive biscuits (for the base)
- 3 tablespoons melted butter
- 1 (8 oz) package cream cheese, softened
- 1 cup heavy cream
- ½ cup powdered sugar
- 1 teaspoon vanilla extract
- 2 tablespoons freshly squeezed lemon juice
- Optional: Fresh fruit or fruit compote for topping (like strawberries, blueberries, or raspberry sauce)
Instructions:
- Make the base: In a bowl, combine the crushed graham crackers or biscuits with melted butter. Stir until everything is well-coated, and the mixture sticks together. Spoon about 2 tablespoons of this mixture into the bottom of each jar. Press it down gently with a spoon to form a nice, even layer.
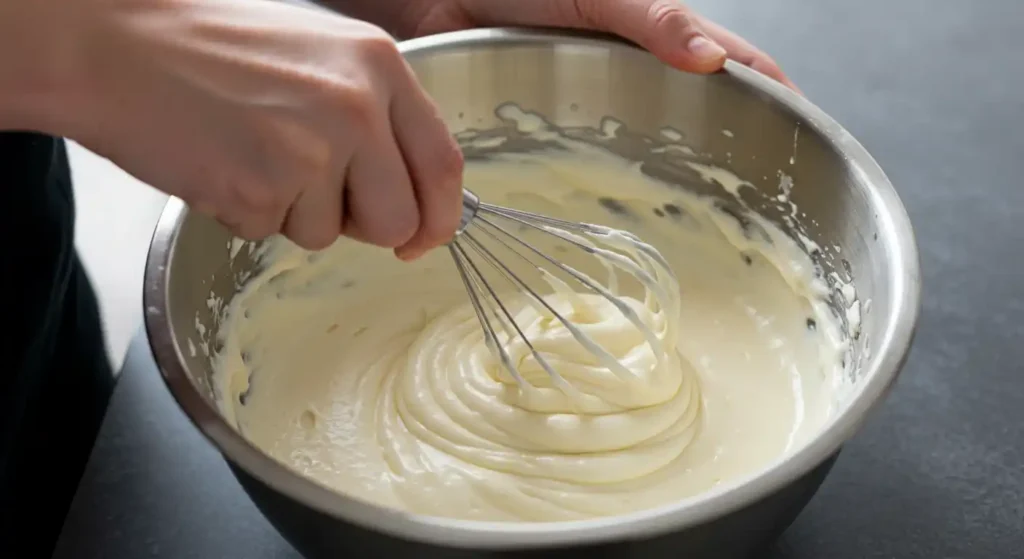
- Make the cheesecake filling: In a separate bowl, beat the softened cream cheese until smooth and creamy. Add in the powdered sugar, vanilla extract, and lemon juice, and mix until fully combined.
- Whip the cream: In another bowl, whip the heavy cream until soft peaks form. Then gently fold the whipped cream into the cream cheese mixture until smooth and fluffy.
- Assemble the jars: Spoon the cheesecake filling over the graham cracker base, filling the jars to about ¾ full. Tap the jars gently on the counter to remove any air bubbles.
- Chill: Cover the jars with a lid or plastic wrap, and pop them into the fridge for at least 4 hours, or preferably overnight, to let them firm up and set.
- Top it off: Before serving, top with your favorite fresh fruit, fruit compote, or even some chocolate drizzle for an extra touch of deliciousness.
How Long Is Cheesecake in a Jar Good For?
Storing Your Sweet Creations
So, you’ve made your no-bake cheesecake jars—now what? You’re probably wondering how long they’ll last. Here’s the scoop: These little beauties can stay fresh in the fridge for up to 4-5 days. Make sure you cover them with lids or wrap them tightly in plastic wrap to keep them fresh. You can even prepare them ahead of time for a dinner party and let them chill in the fridge overnight for a ready-to-serve dessert!
How Long Will No-Bake Cheesecake Keep in the Fridge?
Perfect for Meal Prep
Got leftovers? Lucky you! No-bake cheesecake jars will stay fresh in the fridge for about 4-5 days, so they’re perfect for meal prepping or keeping around for those “I need something sweet” moments. Just make sure they’re stored in an airtight container, and you’re all set for your next sweet craving.
Why Is My No-Bake Cheesecake Not Firming Up?
Achieving the Right Consistency
We’ve all been there—excited to dig into that no-bake cheesecake, only to find it’s a little too runny. If your cheesecake isn’t firming up as expected, here’s why:
- Not enough setting agent – A lot of no-bake cheesecakes rely on ingredients like gelatin or whipped cream to firm up. If there’s not enough, the cheesecake might not set properly.
- Not chilling long enough – Patience, my friend! Give those jars at least 4 hours, but overnight is best. You’ll be rewarded with a perfectly set dessert.
Why Did My No-Bake Cheesecake Collapse?
Keeping Your Cheesecake Firm
A collapsed cheesecake is a sad sight, but don’t worry—it happens! Here are a few reasons why your cheesecake might collapse:
- Overmixing the filling – When you mix the cream cheese and whipped cream, don’t go overboard. Overmixing can incorporate too much air, leading to a collapse once it sets.
- Too much liquid – If you’re adding fruit juice or syrup to your filling, be careful. Adding too much liquid can weaken the structure of your cheesecake.
- Skipping the chilling step – You might be tempted to skip the fridge time, but don’t! Chilling is crucial for a firm, stable cheesecake.
For more creative no-bake dessert ideas, check out this collection of no-bake recipes that are perfect for any occasion.
FAQ :
How Long Is Cheesecake in a Jar Good For?
No-bake cheesecake jars will last for 4-5 days in the fridge. Just make sure they’re tightly covered to keep them fresh.
How Long Will No-Bake Cheesecake Keep in the Fridge?
They’ll keep in the fridge for 4-5 days, making them perfect for make-ahead desserts or leftovers!
Why Is My No-Bake Cheesecake Not Firming Up?
Your cheesecake might not be firming up due to insufficient setting agent or chilling time. Make sure to give it at least 4 hours in the fridge.
Why Did My No-Bake Cheesecake Collapse?
A collapsed cheesecake could be caused by overmixing, too much liquid, or not enough chilling. Keep an eye on the proportions, mix gently, and be patient with the chilling time.
Conclusion
And there you have it! No-bake cheesecake jars are the perfect dessert for any occasion—simple, delicious, and incredibly satisfying. With these tips in hand, you’ll be able to avoid common mistakes and create the perfect jarred cheesecake every time. Whether you’re making them for a crowd or just treating yourself, these jars are guaranteed to be a hit. So go ahead, have fun with it, and enjoy a creamy, no-bake treat today!
No-Bake Cheesecake Jars – A Simple, Creamy Delight
Course: DessertsCuisine: AmericanDifficulty: Easy4
servings15
minutes4
hours330
kcal4
hours15
minutesIngredients
1 cup crushed graham crackers or digestive biscuits
3 tablespoons melted butter
1 (8 oz) package cream cheese, softened
1 cup heavy cream
½ cup powdered sugar
1 teaspoon vanilla extract
2 tablespoons freshly squeezed lemon juice
Optional: Fresh fruit or fruit compote (strawberries, blueberries, raspberry sauce, etc.)
Directions
- Prepare the Base
- Mix crushed graham crackers with melted butter in a bowl. Divide evenly into jars (about 2 tbsp per jar) and press gently to form the crust.
- Make the Cheesecake Filling
- Beat softened cream cheese until smooth. Add powdered sugar, vanilla extract, and lemon juice. Mix until fully combined.
- Whip the Cream
- In a separate bowl, whip the heavy cream until soft peaks form. Fold into the cream cheese mixture gently until smooth and airy.
- Assemble the Jars
- Spoon the cheesecake mixture over the crust in each jar, filling about ¾ of the way. Tap jars to remove air pockets.
- Chill to Set
- Cover with lids or plastic wrap. Chill in the fridge for at least 4 hours or overnight.
- Top and Serve
- Just before serving, top with fruit compote or fresh berries for a beautiful and tasty finish.
Notes
- Not Firming Up? Ensure you chill for at least 4 hours. Whipped cream acts as a setting agent.
- Collapsed Cheesecake? Avoid overmixing the whipped cream into the filling and don’t skip the chilling time.
- Fruit on Top? Add it right before serving to keep your jars fresh and pretty.

